Ah, the vaulted ceiling. That architectural marvel that instantly elevates a room, giving it a sense of airy grandeur. Think of those sun-drenched attics transformed into cozy reading nooks, or those grand living rooms that make you feel like you've stepped into a palatial estate. It's that dramatic upward sweep that adds so much character. But then comes the age-old question, a whisper among DIY enthusiasts and interior design aficionados alike: can you actually put crown molding on a vaulted ceiling?
The answer, my friends, is a resounding, and perhaps slightly more complicated, yes! It’s not quite as straightforward as a standard flat ceiling, where your molding can just sit there, blissfully unaware of any architectural drama. Vaulted ceilings present a unique challenge, a delightful puzzle for those of us who appreciate the little details that can transform a house into a home. It's like trying to find the perfect scarf for an avant-garde outfit – it requires a bit of thought, a dash of creativity, and maybe a willingness to embrace the unexpected.
Let's dive into this architectural enigma, shall we? Because while the thought of a perfectly trimmed vaulted ceiling might conjure images of magazine spreads and Pinterest boards bursting with inspo, the reality involves a bit more… geometry. And that’s where the fun begins!
The Vaulted Ceiling: A Brief Love Affair with Space
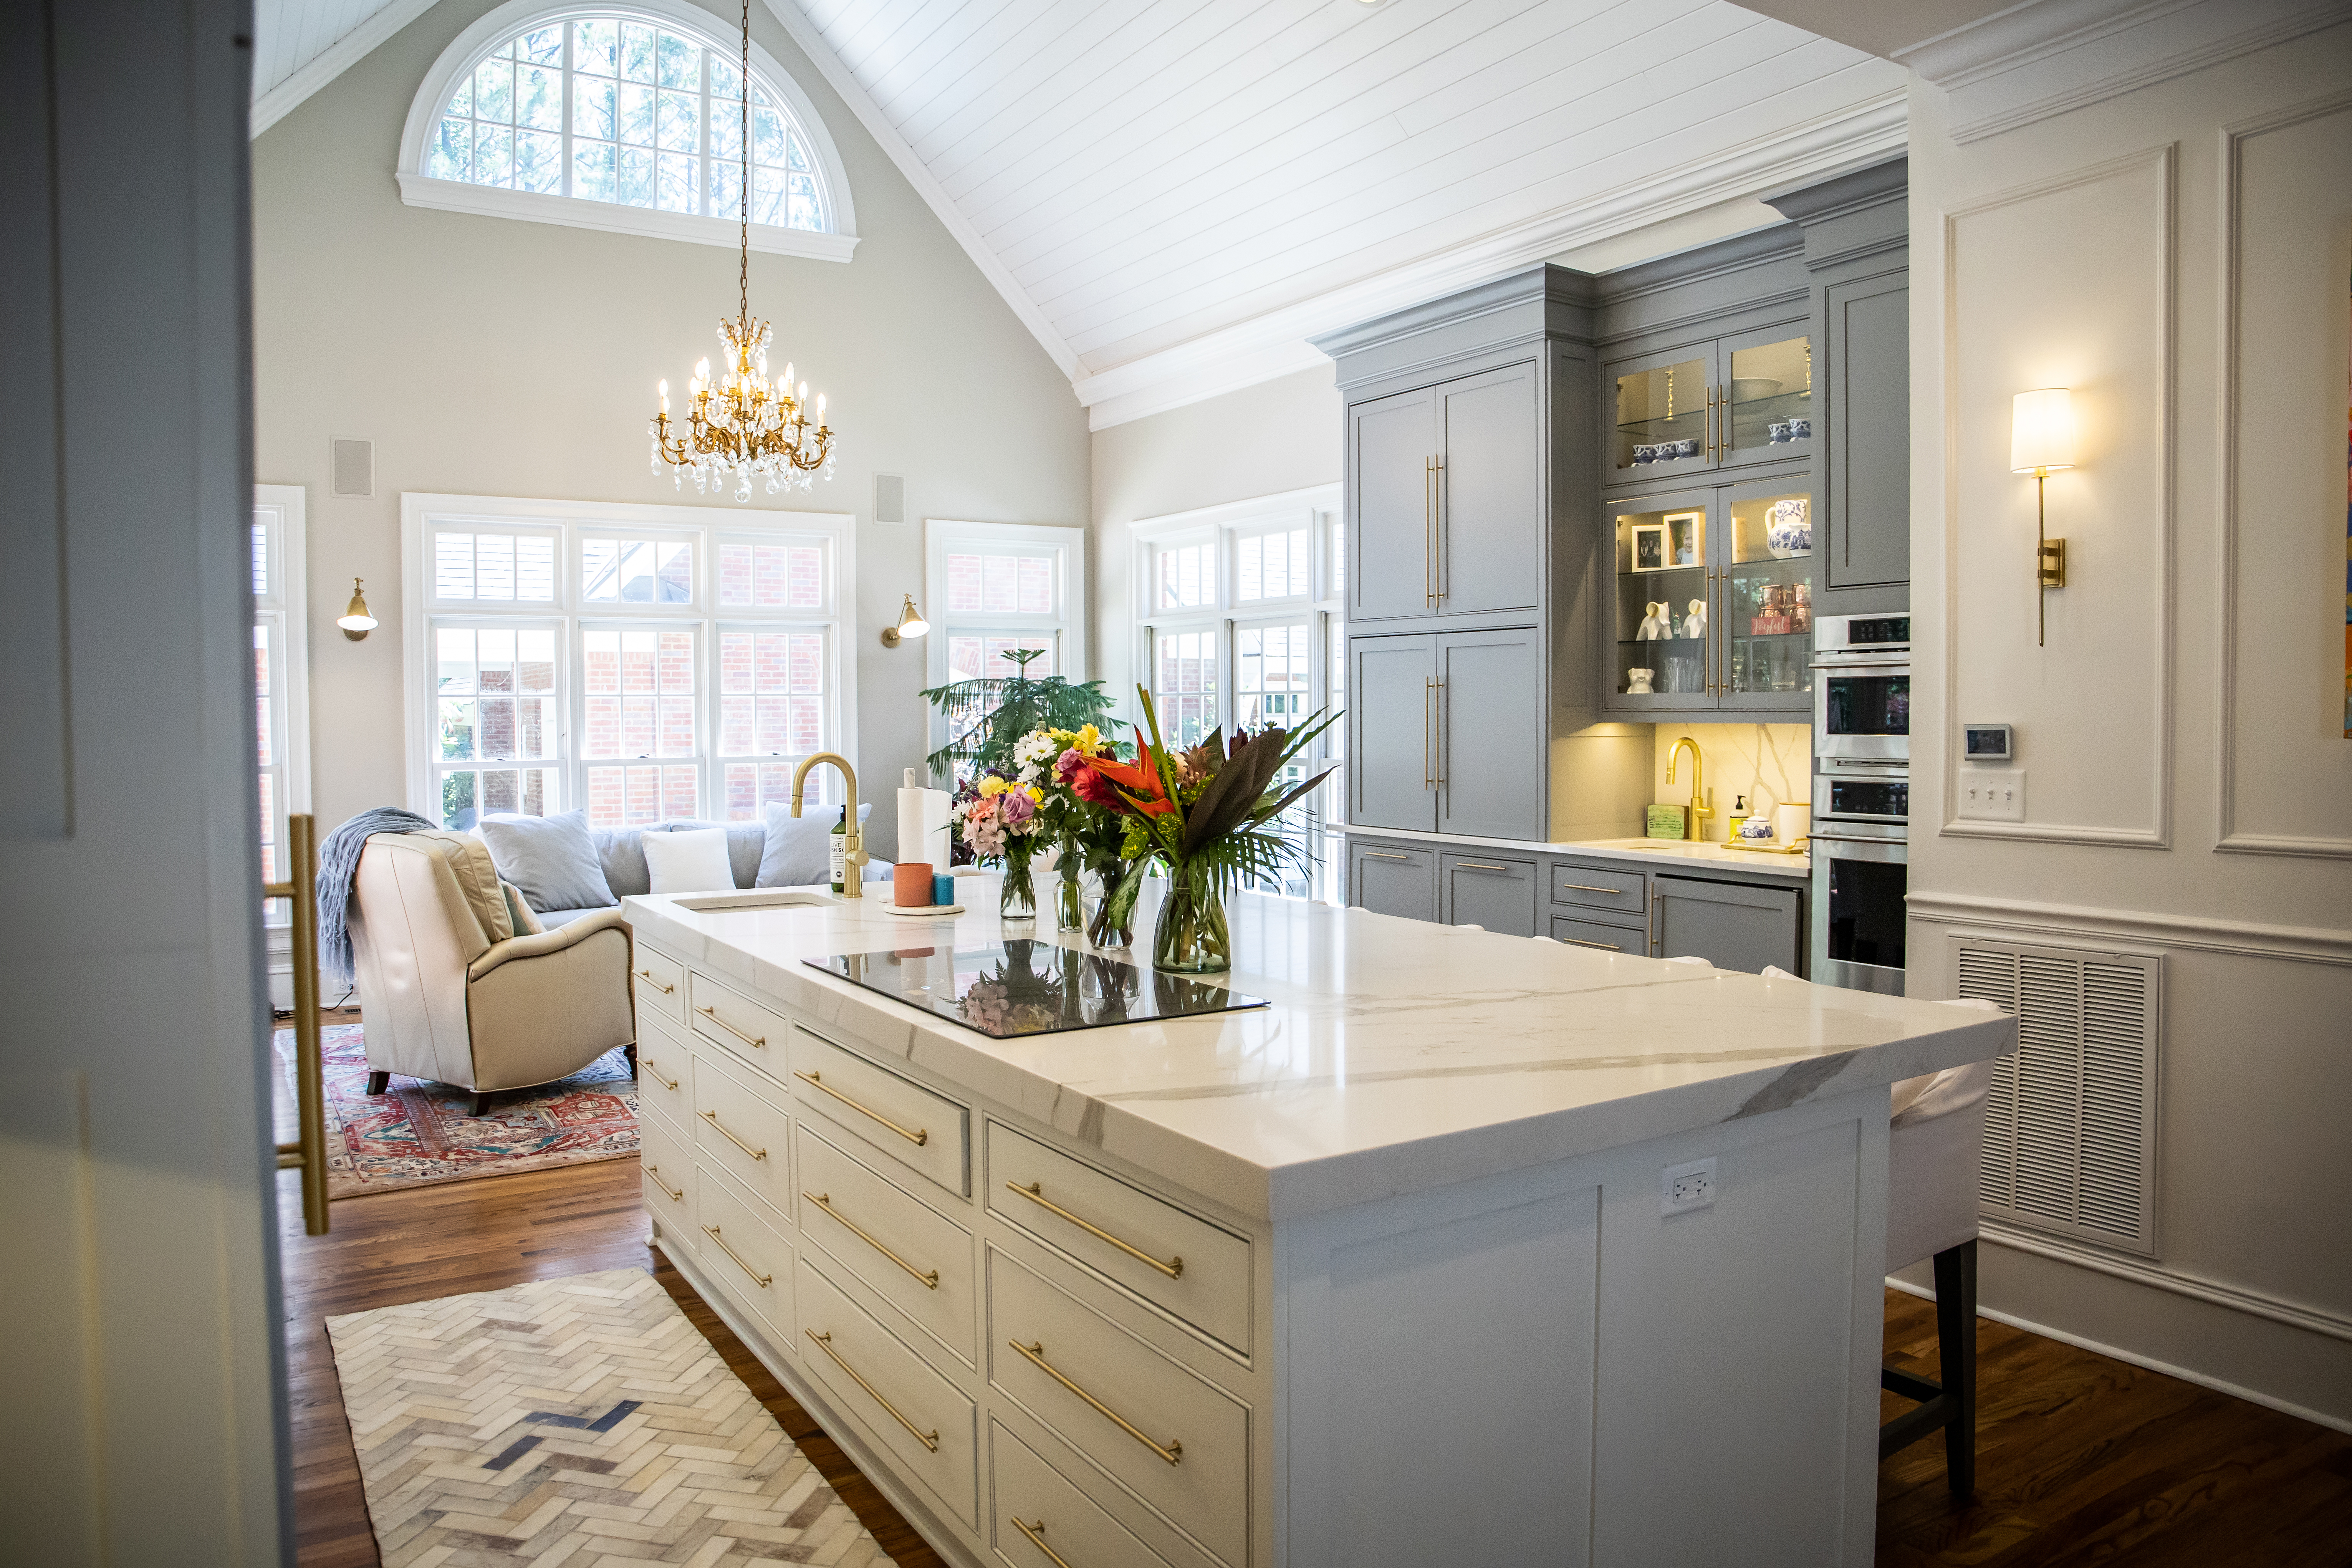
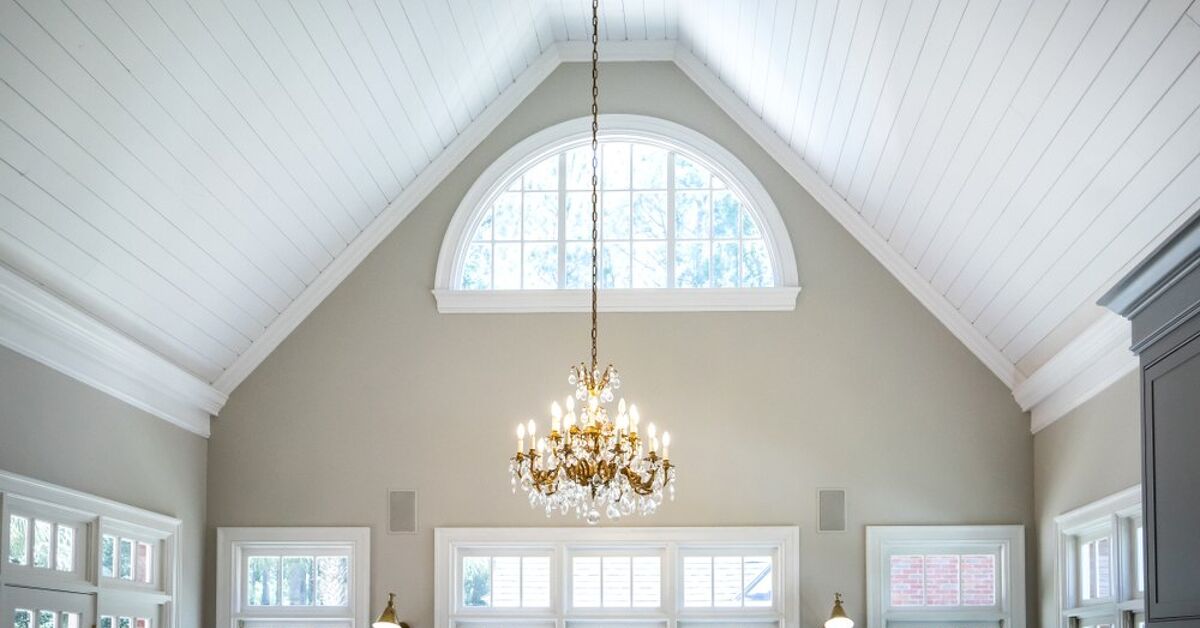
Before we get our hands dirty (or rather, our measuring tapes out), let’s take a moment to appreciate the vaulted ceiling. It’s more than just a ceiling that slopes upwards. It’s an invitation to play with light and shadow, to create a sense of expansive openness that a regular ceiling simply can’t replicate. From the rustic charm of a farmhouse to the sleek modernity of a minimalist loft, vaulted ceilings offer a canvas for all sorts of design dreams.
Historically, vaulted ceilings were often found in grand structures like cathedrals and castles, designed to create a sense of awe and spaciousness. Think of the intricate rib vaults of Gothic architecture – they were as much about structural integrity as they were about reaching for the heavens. Today, we enjoy this grandeur in our homes, often in living rooms, master bedrooms, or those coveted bonus rooms. They’re the architectural equivalent of a deep, satisfying breath of fresh air.
But here’s the thing: that beautiful slope, while undeniably stylish, throws a bit of a wrench into the traditional crown molding installation. It’s not a simple 90-degree angle anymore. We’re dealing with an incline, a gradient, and that means we need to adjust our approach.
The Crown Molding Conundrum: Why the Slope Matters
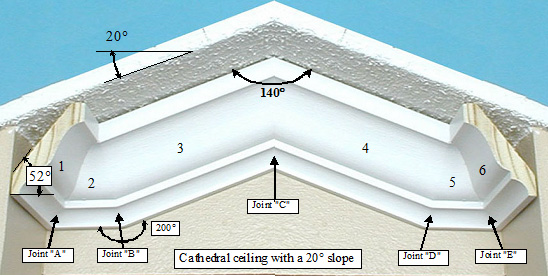
Traditional crown molding is designed to meet the wall at a crisp, clean 90-degree angle. It’s a beautiful transition, a delicate flourish that softens the harsh lines where walls meet ceiling. On a flat ceiling, it’s relatively simple: you cut your molding at a 45-degree angle, press it firmly into the corner, and voilà. Easy peasy.
But on a vaulted ceiling, the angle between the wall and the ceiling is not 90 degrees. It’s an acute angle, and that’s where the magic (and the slight frustration) happens. If you try to install standard crown molding directly against the slope, you’ll end up with unsightly gaps. It’s like trying to fit a square peg into a round hole, but with more sawdust and a higher chance of wanting a glass of wine.
However, this doesn’t mean you have to ditch your crown molding dreams. It just means we need to get a little clever. Think of it as a design challenge, a chance to add a unique touch that reflects your home’s personality. It’s not about overcoming an obstacle; it’s about embracing a new opportunity.

Navigating the Angles: Your Crown Molding Strategy
So, how do we tame this sloping beast? There are a few popular and effective methods, each with its own level of DIY-friendliness and aesthetic appeal. Let’s break them down.
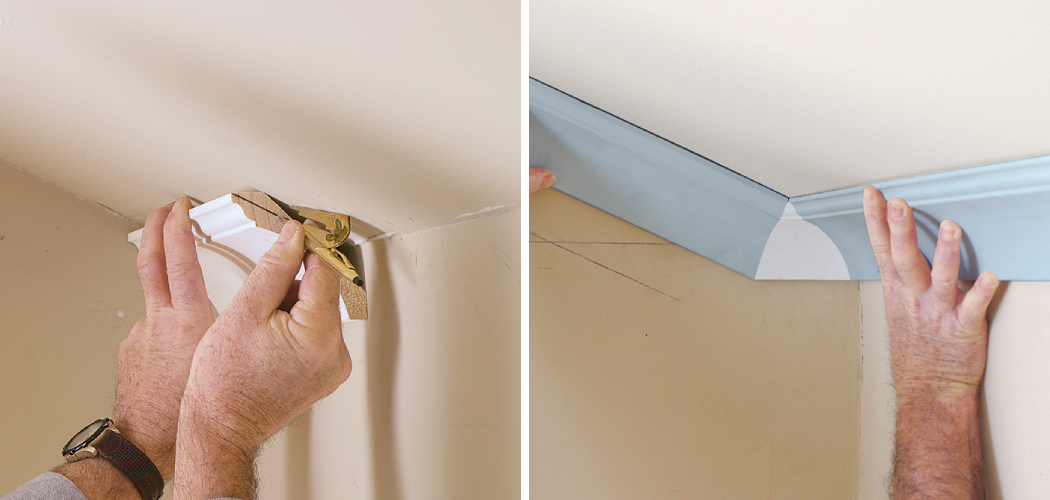
Method 1: The Coping Technique (For the Patient and Precise)
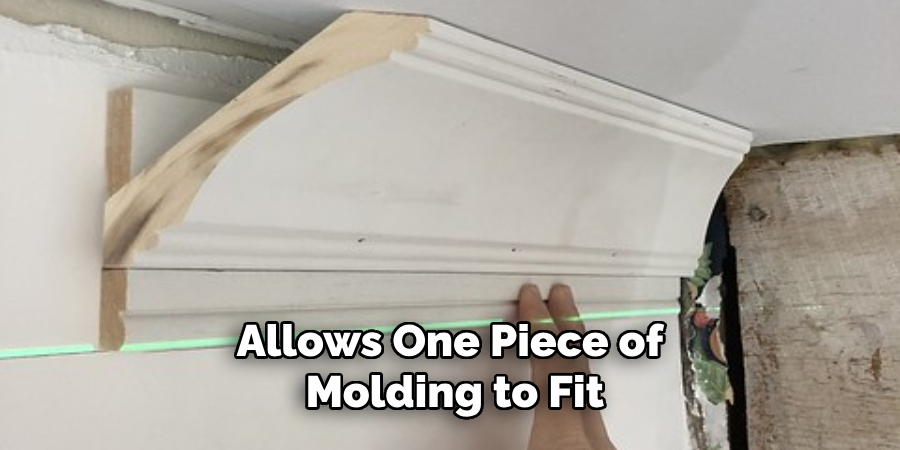
This is often considered the gold standard for a seamless look on vaulted ceilings. Coping involves cutting the molding so that it precisely matches the angle of the ceiling where it meets the wall. It’s a bit like a jigsaw puzzle for woodworkers.
Here's the gist: you’ll need to make two cuts on each piece of molding. First, you’ll make a standard miter cut (usually 45 degrees), which is what you’d do for a flat ceiling. Then, you’ll make a second, more complex cut to remove a sliver of wood, essentially shaping the molding to fit the angle of the vault. This is where a protractor and a good understanding of geometry can be your best friends. Think of it as a slightly more advanced form of origami, but with woodworking tools.
Pro Tip: Practice on scrap wood first! Seriously, save yourself the headache and the wasted molding. Get a feel for the cuts before you tackle your actual project. It’s the equivalent of rehearsing your lines before a big performance – important for a stellar outcome.
The beauty of coping is that it creates a truly flush fit, with no visible gaps. It’s the kind of detail that makes a designer swoon and a homeowner beam with pride. It’s also a technique that has been around for centuries, a testament to its enduring effectiveness. Imagine ancient Roman artisans meticulously crafting their moldings – you’re joining a long lineage of detail-oriented builders!
Method 2: The Back-Cutting Trick (A Smarter Cut)
This is a variation on the coping theme, and for some, it’s a bit more intuitive. Instead of coping the molding to fit the wall, you’re essentially cutting the molding at an angle that allows it to sit flush against the ceiling slope and then butt up against the wall. This requires a specialized jig or a very steady hand with your miter saw.
The idea is to cut the molding at an angle that’s slightly different from your standard 45-degree miter. This angle will depend on the specific pitch of your vaulted ceiling. You're essentially creating a "lean" in your molding so it rests comfortably against the sloping surface.
Fun Fact: This method is often favored by experienced trim carpenters because it can be faster than traditional coping once you've mastered the angles. It’s a testament to how skilled tradespeople develop their own ingenious shortcuts and techniques.
The result is still a very clean look, though it might require a touch more caulk and filler to achieve that perfect, seamless finish compared to perfectly coped joints. But for many DIYers, it’s a more approachable way to achieve a professional-looking outcome.
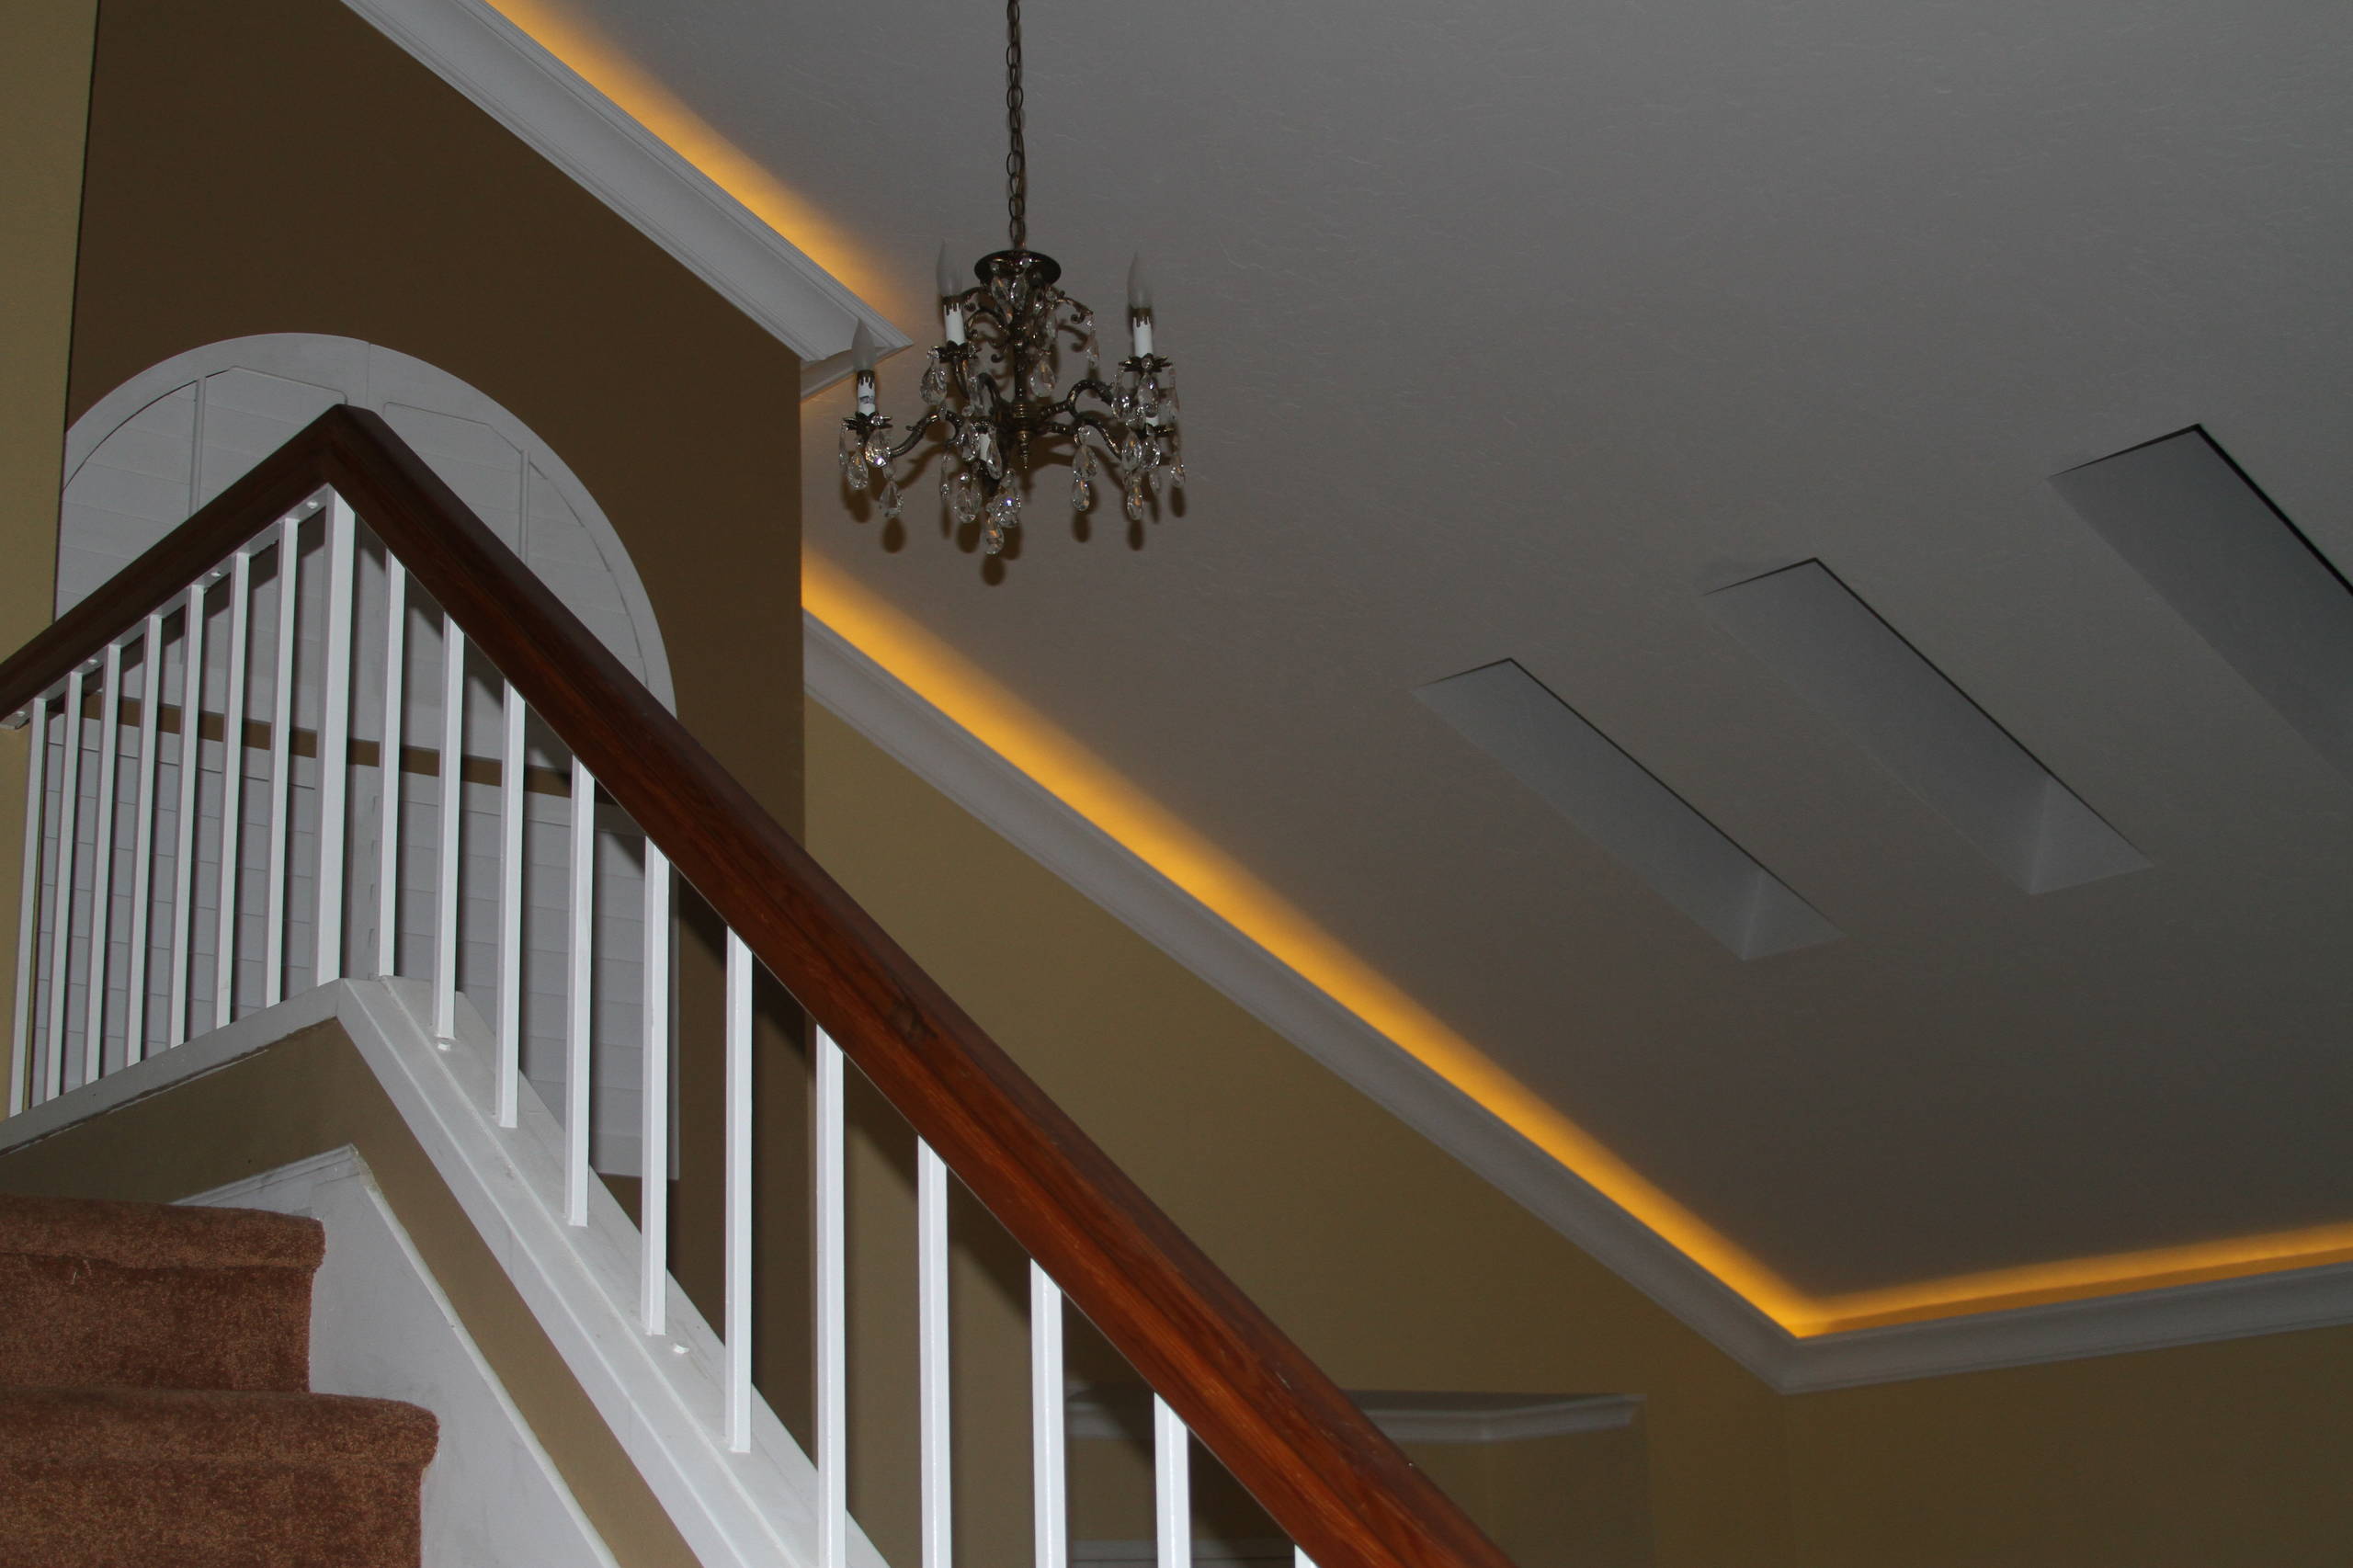
Method 3: The Dropped Ceiling/Beam Approach (For Maximum Impact)
This is a more ambitious, but incredibly dramatic, option. Instead of trying to fit molding directly onto the sloping ceiling, you create a flat plane below the vault. This could involve building a flat ceiling at a lower level, creating a coffered effect, or even installing a decorative beam system.
Once you have your flat plane, you can then install crown molding just as you would on any other flat ceiling. This method allows for a lot of creative freedom and can completely transform the look of your room. You can also use this as an opportunity to incorporate dramatic lighting features or intricate architectural details.
Cultural Reference: Think of the grand libraries and study rooms in classic movies, often featuring dark wood paneling and intricate beams. This method allows you to channel that old-world charm with a modern twist.
This approach is definitely more involved and will likely require more advanced carpentry skills, or even professional help. But the payoff in terms of visual impact can be absolutely stunning. It’s the architectural equivalent of adding a statement necklace to an already beautiful outfit – it takes it to the next level.
Choosing Your Crown: Beyond the Angles
Once you've got your installation strategy in mind, it’s time to think about the style of your crown molding. On a vaulted ceiling, the scale and profile of your molding become even more important.
Scale is Key: A tiny, delicate molding might get lost on a grand, sweeping vaulted ceiling. Conversely, an overly chunky molding can overpower the space. You want a molding that’s proportional to the height and expanse of your ceiling. A good rule of thumb is to measure the height of your wall from the baseboard to the peak of the vault. Generally, taller ceilings can handle wider and more elaborate moldings.
Material Matters: Most crown molding is made from wood (pine, poplar, oak) or polyurethane. Wood is classic and can be painted or stained, but it can be susceptible to moisture. Polyurethane is lighter, more durable, and often pre-primed, making it a popular choice for DIYers. For vaulted ceilings, especially in areas with humidity, polyurethane can be a more forgiving option.
The Profile: Crown molding comes in countless profiles, from simple, understated designs to ornate, detailed patterns. On a vaulted ceiling, you have the opportunity to make a statement. Consider a more dramatic profile that complements the grandeur of the space. If your room has a more minimalist aesthetic, a simpler profile might be best to avoid visual clutter.
Don't Forget the Paint (or Stain!): The color of your crown molding can significantly impact the room. Painting it the same color as your ceiling can create a seamless, airy feel. Painting it a contrasting color can add a bold architectural element. And of course, if you’re using wood, staining it can bring warmth and natural beauty to the space.
The DIYer’s Toolkit: What You’ll Need
Before you embark on your crown molding adventure, ensure you have the right tools. This isn't a job for a butter knife and a prayer. You'll want:

- A good quality miter saw: Essential for making those precise angle cuts. A compound miter saw will give you more flexibility.
- Measuring tape: Accuracy is paramount.
- Pencil: For marking your cuts and measurements.
- Safety glasses: Always protect your eyes!
- Caulk gun and paintable caulk: For filling any small gaps and creating that seamless finish.
- Nail gun (brad nailer): Makes attaching the molding much easier and provides a cleaner look than hammering.
- Stud finder: Crucial for securing your molding to the wall studs for maximum stability.
- Level: To ensure your molding is straight and even.
- Scrap wood: For practicing your cuts!
- A comfortable ladder or scaffolding: Safety first when working at heights.
Pro Tip: If you're tackling this solo, consider renting or borrowing some of the larger equipment if you don't plan on making it a regular hobby. It's better to have the right tools than to struggle with the wrong ones.
The Final Flourish: Caulk, Fill, and Admire
Once your molding is up, the work isn't quite done. The real magic happens in the finishing touches. This is where you transform your slightly imperfect, but installed, molding into a polished, professional-looking feature.
Caulking is Your Best Friend: Run a bead of paintable caulk along all the seams where the molding meets the ceiling and the wall. This will fill any tiny gaps and create a smooth, continuous line. Smooth it out with your finger or a damp cloth for a professional finish. It’s like the final brushstroke on a masterpiece.
Filling Nail Holes: Use wood filler to fill any nail holes left by your nail gun. Once dry, sand them smooth so they disappear. This is the secret to that factory-perfect look.
The Grand Reveal: And then, the moment you’ve been waiting for – painting or staining! Choose a color that enhances your room’s aesthetic. A crisp white can make your ceiling feel even higher, while a darker color can add a cozy, intimate feel. Step back, admire your handiwork, and bask in the glory of your beautifully transformed space.
A Little Reflection on the Bigger Picture
Thinking about crown molding on a vaulted ceiling is, in many ways, a metaphor for how we approach life’s challenges. We encounter a situation that isn’t perfectly straightforward – the sloping ceiling, the unexpected curveball, the project that requires a bit more thought than anticipated. Do we throw up our hands and give up? Or do we roll up our sleeves, assess the situation, and find a creative solution?
The beauty of that vaulted ceiling, and the satisfaction of adding crown molding to it, lies not just in the final aesthetic, but in the process. It’s about problem-solving, about learning new skills, and about taking pride in the effort we put forth. It’s about understanding that sometimes, the most rewarding outcomes come from embracing a little complexity and refusing to settle for the easiest path. It’s in these little victories, these thoughtfully completed projects, that we build not just beautiful spaces, but a sense of accomplishment and a deeper connection to our homes and to ourselves. And that, my friends, is a feeling that truly elevates any room, any day.