Ever stared at a wall in your home and thought, "You know, that little ding right there is really bugging me"? Or maybe it’s a tiny crack that looks like a miniature lightning bolt, threatening to take over your entire living room. We’ve all been there! Sometimes, after a fresh coat of paint, these little imperfections suddenly become the stars of the show, don't they? It’s like the paint itself is saying, "Look at me, imperfections!"
And then, the age-old question pops into your head, probably while you’re sipping your morning coffee or scrolling through home improvement videos that make everything look impossibly easy: “Can I just slap some drywall mud over this painted spot and call it a day?” It’s a tempting thought, right? Like a magic wand for your walls.
Let’s dive into this. Think of your drywall like a perfectly manicured lawn. You’ve got it looking pretty good, all smooth and green (or, in this case, painted and smooth). Now, imagine you’ve got a tiny little weed popping up. You could just try to snip the top off, but that weed’s roots are still there, aren’t they? Eventually, it’ll probably grow back, or at least leave a noticeable stub. Or, you could dig the whole thing out properly and then patch the little hole with fresh soil.
Applying drywall mud over painted drywall is a bit like that weed-snipping situation. It can work, but it’s usually not the best long-term solution, and it often comes with its own set of little headaches. We’re talking about your walls here, folks! These are the backdrops to your life, the silent witnesses to your Netflix binges, your family dinners, your kids’ first wobbly steps. They deserve a little love, and sometimes, that love means doing things the right way.
So, What's the Deal with Painting Over Imperfections?
When you have a small ding or a tiny crack, and you’ve already painted over it, that paint is essentially a smooth, sealed surface. Now, you want to apply drywall mud – that creamy, goopy stuff that fixes holes and smooths seams. Drywall mud is designed to stick to bare drywall or to previously textured or patched surfaces that have been properly prepped.
![Can You Put Drywall Mud Over Paint: 5 Types [Covered]](https://handyworkshop.com/wp-content/uploads/2022/12/Paints-You-Can-Use-for-Drywall-Mud-Premixed-Mud.webp)
The problem with painting over a tiny imperfection and then mudding over the paint is that the paint acts like a barrier. It’s like trying to get two magnets to stick when you’ve put a piece of paper between them. The mud might stick initially, but it's not going to have that strong, durable bond it would have with the actual drywall paper or the underlying primer.
The "Maybe, But Probably Not a Good Idea" Scenario
If you have a very tiny, superficial scratch or a little paint chip that you want to cover, and you’re just slapping a tiny dab of mud on it and smoothing it out, you might get away with it. You know, those little nicks you get when you’re moving furniture and it’s more of a scuff than a real gouge. In those rare instances, if you’re super careful, feather it out thin, and let it dry completely, it might look okay. But even then, there’s a little voice in the back of your head saying, “Is this going to last?”
Imagine you’re frosting a cake that’s already got a thin layer of wax paper on it. The frosting will sit on the paper, but it won’t really adhere to the cake underneath. And when you go to slice that cake, the frosting might just slide right off the paper. Not ideal, right?

Why Should You Care About This Mud-Painting Conundrum?
Okay, so why all the fuss? Why can’t we just be lazy homeowners and slap mud where we want it? Because, my friends, the goal is usually to have walls that look good, feel smooth, and last. We don't want to be doing touch-ups every few months. We want to be able to hang pictures, lean against the wall (maybe not too hard, but you know), and just generally live our lives without our walls staging a rebellion.
If you apply mud over paint and it doesn’t adhere properly, you’ll likely end up with:
- Cracking: The mud might shrink and crack as it dries because it’s not bonded to the drywall. Think of it like dried-up mud in a puddle – it starts to break apart.
- Peeling: Over time, that loosely attached mud can start to peel away from the painted surface, leaving an even uglier mess than you started with. It’s like a bad hair day for your wall.
- A Bumpy Finish: Even if it doesn't peel or crack, the paint can create an uneven surface, making it harder to get a smooth, seamless patch. You’ll see the outline of your repair, and not in a good way.
- More Work Later: What seemed like a shortcut will likely turn into a bigger repair job down the line. You’ll have to scrape off the failed mud job, then prep the wall, then re-mud and repaint. It’s like digging yourself into a hole you then have to climb out of.
The "Right" Way to Do It (It's Not That Scary!)
So, what’s the responsible, wall-loving homeowner thing to do? It’s actually pretty straightforward, and most of us can handle it. The golden rule is: drywall mud needs something to grip onto.
If you have a painted wall and you need to patch or repair it, here’s the general idea:
- Identify the Imperfection: Is it a deep gouge, a nail pop, a crack, or just a scuff?
- Prep the Area: This is the most crucial step! For most repairs, you'll need to lightly sand the painted surface around the imperfection. This roughens up the smooth paint, giving the mud something to grab onto. Think of it like giving your wall a gentle exfoliation.
- Clean it Up: Wipe away all the dust from sanding with a damp cloth. You want a clean surface, free of debris.
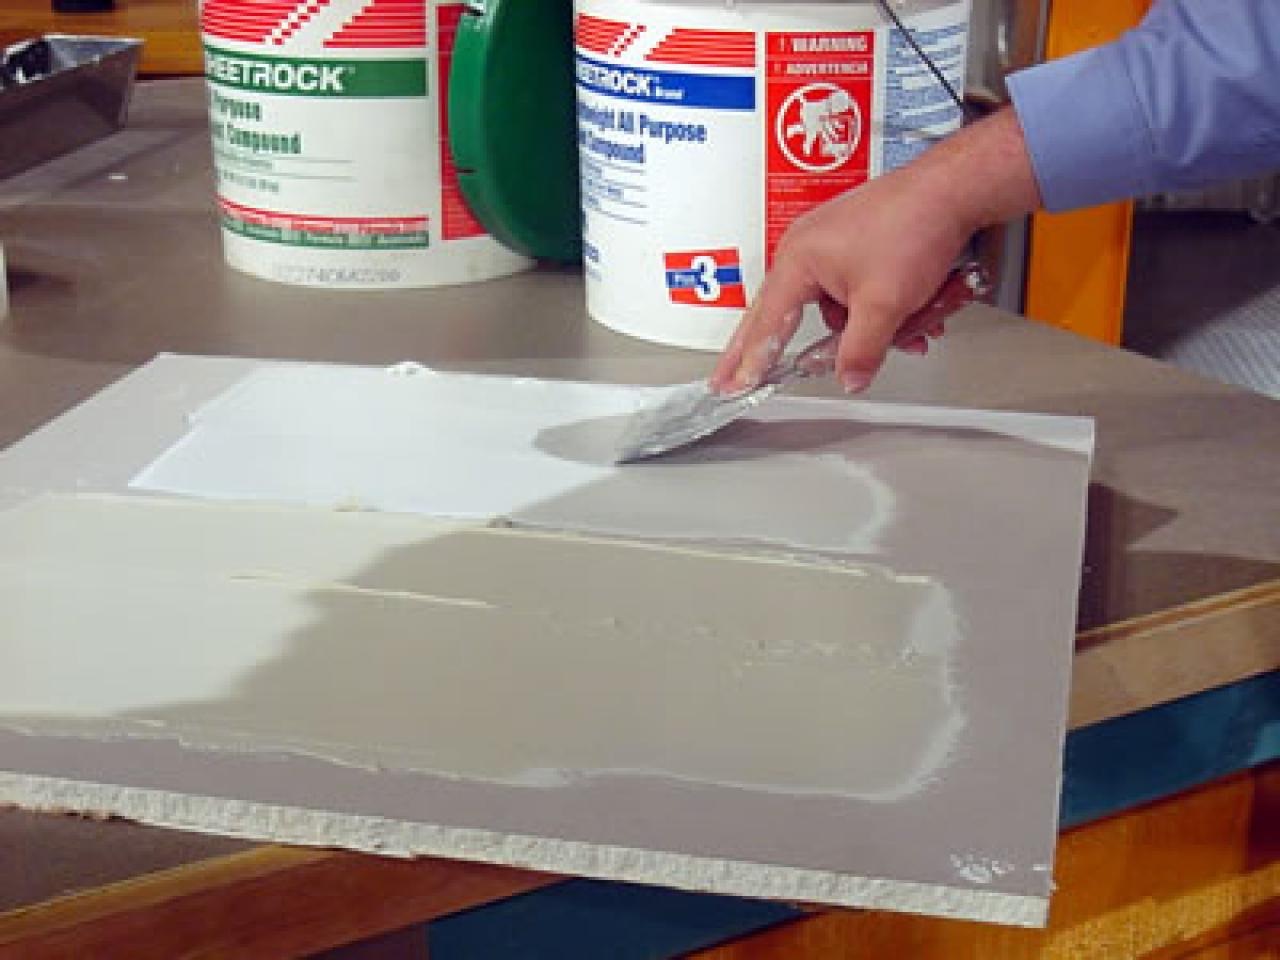
- Apply the Mud: Now you can apply your drywall mud. For small dings, a small dab might be enough. For larger repairs, you might need a patch or joint tape.
- Feather the Edges: This means blending the mud out so it’s thin and seamless with the surrounding wall. It’s like fading out a pencil line so you can’t see where it starts and stops.
- Let it Dry: Patience is a virtue here! Let the mud dry completely. It usually turns from gray to a lighter, chalky white.
- Sand Again: Once dry, sand the patched area smooth. You're aiming for a surface that feels as smooth as the rest of your wall.
- Clean and Prime: Wipe away the dust again. Crucially, you’ll want to apply a coat of primer over the patched area. Primer helps seal the mud and ensures that your new paint will match the sheen and color of the rest of your wall.
- Paint: Finally, paint your repaired spot to match the rest of your wall.
It might seem like a few extra steps, but trust me, it’s the difference between a repair that looks like a quick fix and one that’s virtually invisible and built to last. It’s the difference between a wall that whispers "look, a patch!" and one that confidently says, "I'm all good here!"
![Can You Put Drywall Mud Over Paint: 5 Types [Covered]](https://handyworkshop.com/wp-content/uploads/2022/12/Drywall-Mud-Skim-Coating-Paints-That-Cant-Be-Used.webp)
The Takeaway: A Little Effort Goes a Long Way
So, can you apply drywall mud over painted drywall? Technically, you can. But should you? Generally, no, not if you want a good, lasting result. Think of it like this: you wouldn't try to glue a broken ceramic mug back together with just a dab of craft glue and hope it holds your hot coffee. You'd use a stronger adhesive, right? Your walls deserve that same level of care.
Embracing the prep work, the sanding, the priming – it’s not about being a perfectionist; it’s about being a smart homeowner. It’s about investing a little time now to save yourself a headache (and a potentially unsightly wall) later. Plus, there’s a certain satisfaction in knowing you’ve done it right. It’s like baking a cake from scratch versus using a mix – the process might be a bit more involved, but the delicious result is so much more rewarding.
Next time you see a little imperfection calling out for attention, remember this: a little sanding and priming is your best friend. Your walls will thank you for it, and you’ll be able to enjoy your beautiful, smooth surfaces for years to come!

![Can You Put Drywall Mud Over Paint: 5 Types [Covered]](https://handyworkshop.com/wp-content/uploads/2022/12/How-to-Put-Drywall-Mud-Over-Paint.jpg)
![How to Fix a Bad Mud Job On Painted Drywall: 3 Steps [DIY]](https://handyworkshop.com/wp-content/uploads/2022/12/Can-You-Paint-Over-Slightly-Wet-Mud-on-Drywall.webp)

